

| << Chapter < Page | Chapter >> Page > |
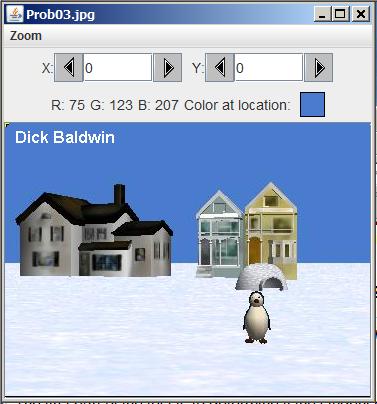
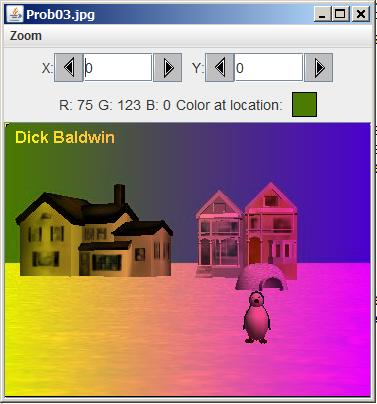
Figure 2 - The modified image.
| Figure 3 . Text output on the command-line screen. |
|---|
java version "1.6.0_14"
Java(TM) SE Runtime Environment (build 1.6.0_14-b08)Java HotSpot(TM) Client VM (build 14.0-b16,
mixed mode, sharing)javac 1.6.0_14

Dick BaldwinPicture, filename Prob03.jpg height 274 width 365 |
The required output on the command-line screen is shown by the last two lines of text in Figure 3 . The remaining text in Figure 3 was produced by the system during the compilation and execution process.
Will explain in fragments
I will explain this program in fragments. A complete listing is provided in Listing 8 near the end of the module.
I will begin with the driver class named Prob03 , which is shown in its entirety in Listing 1 .
| Listing 1 . The driver class named Prob03. |
|---|
public class Prob03{
  public static void main(String[]args){
    Prob03Runner obj = new Prob03Runner();obj.run();
    System.out.println(obj.getPicture());}//end main
}//end class Prob03 |
There is nothing in Listing 1 that I haven't explained in earlier modules. Therefore, no explanation of the code in Listing 1 should be required.
Beginning of the class named Prob03Runner
The class definition for the class named Prob03Runner begins in Listing 2 .
| Listing 2 . Beginning of the class named Prob03Runner. |
|---|
class Prob03Runner{
  //Instantiate the Picture object.private Picture pic = new Picture("Prob03.jpg");

  public Prob03Runner(){//constructorSystem.out.println("Dick Baldwin");
  }//end constructor//----------------------------------------------------//

//Accessor methodpublic Picture getPicture(){return pic;} |
Once again, there is nothing in Listing 2 that I haven't explained before. I included it here simply for the sake of continuity.
The beginning of the run method
The run method begins in Listing 3 . The run method is where most of the interesting action takes place.
| Listing 3 . The beginning of the run method. |
|---|
public void run(){
    pic.addMessage("Dick Baldwin",10,20);//Display a PictureExplorer object.
    pic.explore();//Get an array of Pixel objects.
    Pixel[]pixels = pic.getPixels();

    //Declare working variablesPixel pixel = null;
    int green = 0;int blue = 0;
    int width = pic.getWidth();double greenScale = 0;
double blueScale = 0; |
Much of what you see in Listing 3 has been explained in earlier modules. However, Listing 3 does deserve a few comments.
Display the raw image
The call to the explore method produces the output shown in Figure 1 .
Get an array of Pixel data
The call to the getPixels method in Listing 3 returns a reference to a one-dimensional array object. The elements in the arrayare references to Pixel objects, where each Pixel object represents a single pixel in the image. I will explain the organization of the pixel data later .
Get the width of the image
The call to the getWidth method in Listing 3 returns an int value that specifies the width of the image in pixels. This value will be usedlater to compute the column to which each pixel belongs.
Local variables
Listing 3 declares six local variables. The purpose of these variables should become clear during the explanation of the code thatimplements the algorithm.
Notification Switch
Would you like to follow the 'Object-oriented programming (oop) with java' conversation and receive update notifications?

|
|

|
|

|
|

|
|

|
|

|
|

|
|

|
|
|
|
|

|