

| << Chapter < Page | Chapter >> Page > |
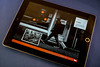
This object will be used to display messages that track the progress of the program as the user clicks the buttons at the bottom of Figure 4. If thetext area becomes full, a vertical scroll bar will automatically appear on the right side of the text area.
Prepare an embedded image and add it to the Panel
Listing 7 prepares an embedded image, loads it into an Image object, and adds the Image object to the Panel .
[Embed("/Images/snowscene.jpg")]
      var img:Class;image.load(img);addChild(image);
Comparable MXML code
In case you're interested, the ActionScript code in Listing 7 is essentially comparable to the MXML code in Figure 7.
<mx:Image id="img"
source="@Embed(source='/Images/snowscene.jpg')"/>
Note, however, that in order to cause Figure 7 to fit into this narrow publication format, I inserted an extra line break character ahead of the secondoccurrence of the word "source." An MXML parser may not be willing to accept this line break.
Add the button bar to the panel
The six buttons at the bottom of Figure 4 are contained in an object of the class ControlBar , which was instantiated in Listing 4.
Listing 8 adds the ControlBar container to the Panel object.
addChild(bar); Prepare the six buttons for use
The code in Listing 9:
//Set text on the six buttons.
      startButton.label = "Start";pauseButton.label = "Pause";
      resumeButton.label = "Resume";reverseButton.label = "Reverse";
      endButton.label = "End";resetButton.label = "Reset";//Register a click listener on each button
      startButton.addEventListener(MouseEvent.CLICK,btnHandler);
      pauseButton.addEventListener(MouseEvent.CLICK,btnHandler);
      resumeButton.addEventListener(MouseEvent.CLICK,btnHandler);
      reverseButton.addEventListener(MouseEvent.CLICK,btnHandler);
      endButton.addEventListener(MouseEvent.CLICK,btnHandler);
      resetButton.addEventListener(MouseEvent.CLICK,btnHandler);

      //Add the six buttons to the button barbar.addChild(startButton);
      bar.addChild(pauseButton);bar.addChild(resumeButton);
      bar.addChild(reverseButton);bar.addChild(endButton);
      bar.addChild(resetButton);
Configure the Resize object
The resize effect that I described earlier is accomplished by calling the play method on the object of the class Resize that was instantiated in Listing 4.
Listing 10 targets that effect to the image shown in Figure 4. Listing 10 also specifies the final size of the image and the ten-second duration duringwhich the resize effect will play. (Note that the original size of the image is 240x240 pixels and it will be resized to one-fourth of its originalsize.)
resize.target = image;
      resize.widthTo = 60;resize.heightTo = 60;
      resize.duration = 10000;resize.addEventListener(EffectEvent.EFFECT_END,endEffectHandler);
      resize.addEventListener(EffectEvent.EFFECT_START,startEffectHandler);

} //end constructor Notification Switch
Would you like to follow the 'Object-oriented programming (oop) with actionscript' conversation and receive update notifications?

|
|

|
|

|
|
|
|
|

|
|

|
|

|
|

|
|

|
|
|