

| << Chapter < Page | Chapter >> Page > |
The following series of slides moves you through the process of creating a Connexions module.

When the “New module: License agreement” screen appears, read the information, check the box that you agree and move on to “Next”.
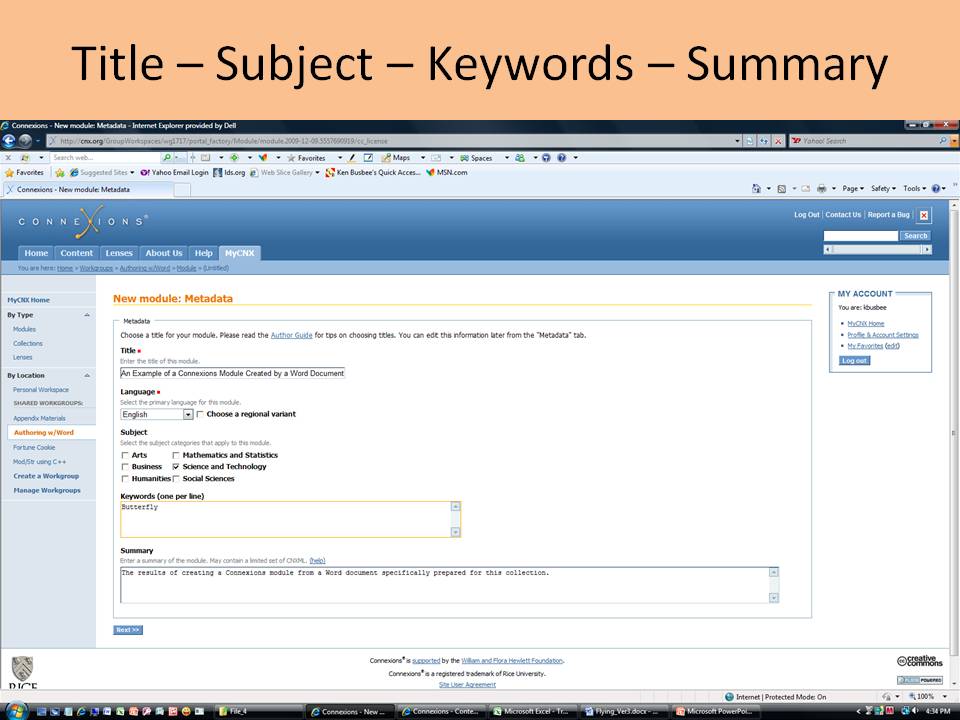
There are five (5) items within the metadata. Two of them will be established by copying and pasting the “Title” and “Summary” from your previously prepared spreadsheet (see the next slide). Most authors using these materials will leave the “Language” selection as English. Check one of the six (6) “Subject” boxes most appropriate to your module content.
The “Keywords” box allows you to enter additional words (one concept per line) that will be added to the “Index of Keywords and Terms” that would be automatically created when this module is included in a collection. Don’t add items that have already been tagged within the document as “CNXML Term” or “CNXML Definition (Term)”. In the example above the keyword “Butterfly” was added to this module.
Click on “Next” when ready.

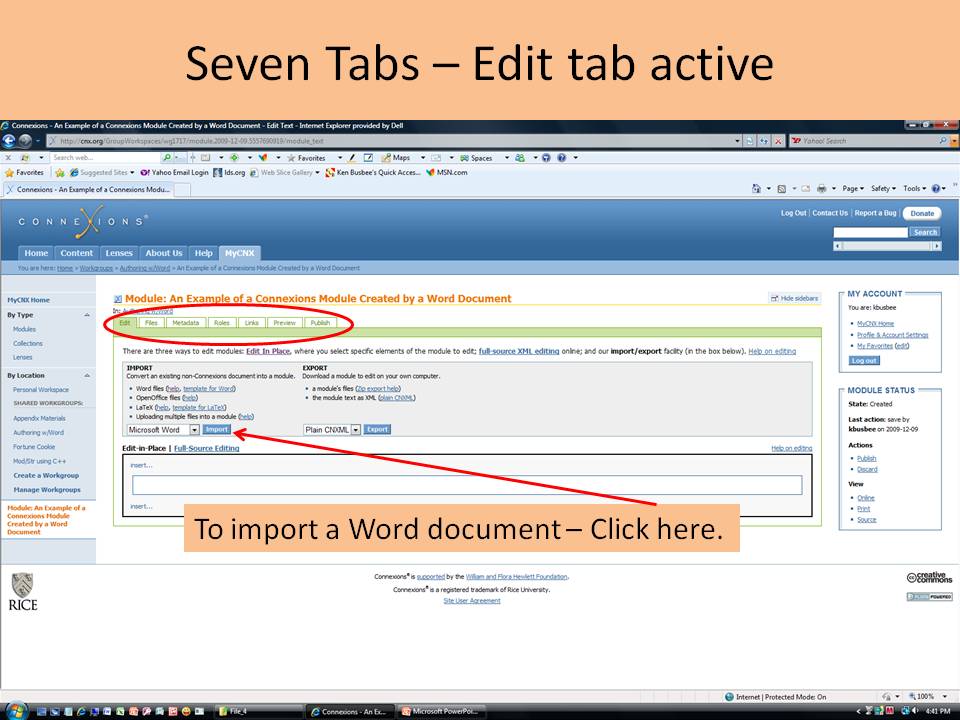
A work area with seven (7) tabs will appear with the “Edit” tab active. The “Edit” tab allows you to build the module content. However, we are not going to type in our module content, but import it from a Microsoft Word document (previously prepared). Click on the “Import” button.

Follow the steps to browse to your previously prepared Word document; then “Import” it.
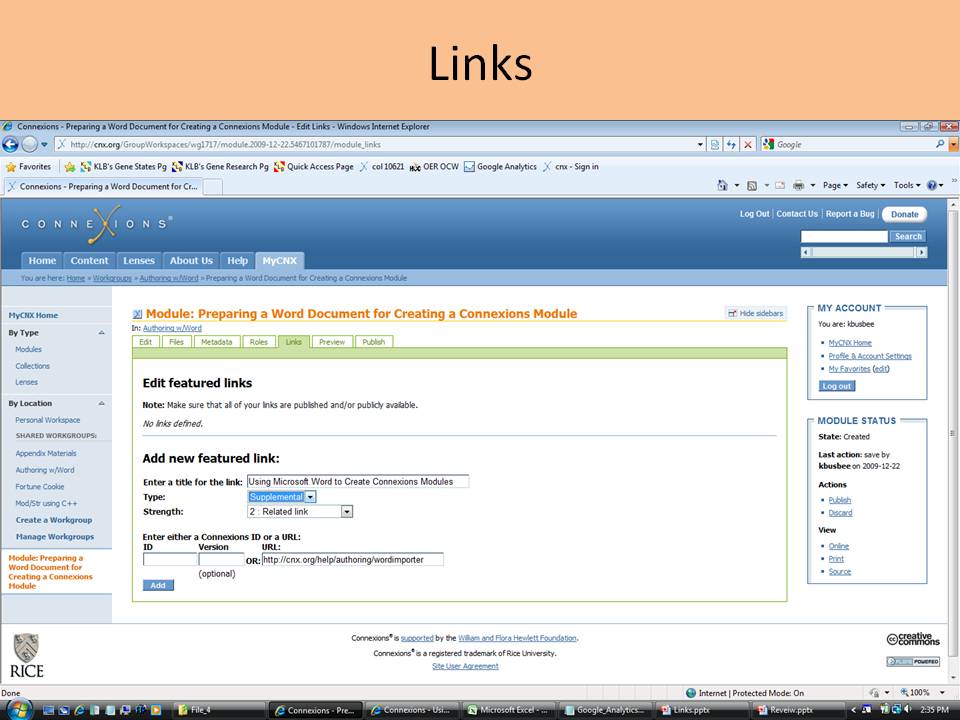
We have basically completed the “Edit” and “Metadata” tabs. As a new author you will not normally use the “Files” or “Roles tabs”; thus we will not cover them within this training. Click on the “Links” tab.
Links are added to web pages but not to the printed .PDF files . They appear in the upper right part of a module’s web page. You have seen and used links in other modules associated with this training. There are four items to establish with a link:
Click on the “Add” button when ready.
You may add additional links as desired.

The “Preview” allow us to view how our module will appear in both online and print modes. The online button will cause the module to appear as it will be shown. You can review it and test any links that you created. Hit the back button on your internet browser to return to the page and/or to return back to the Connexions module building page.
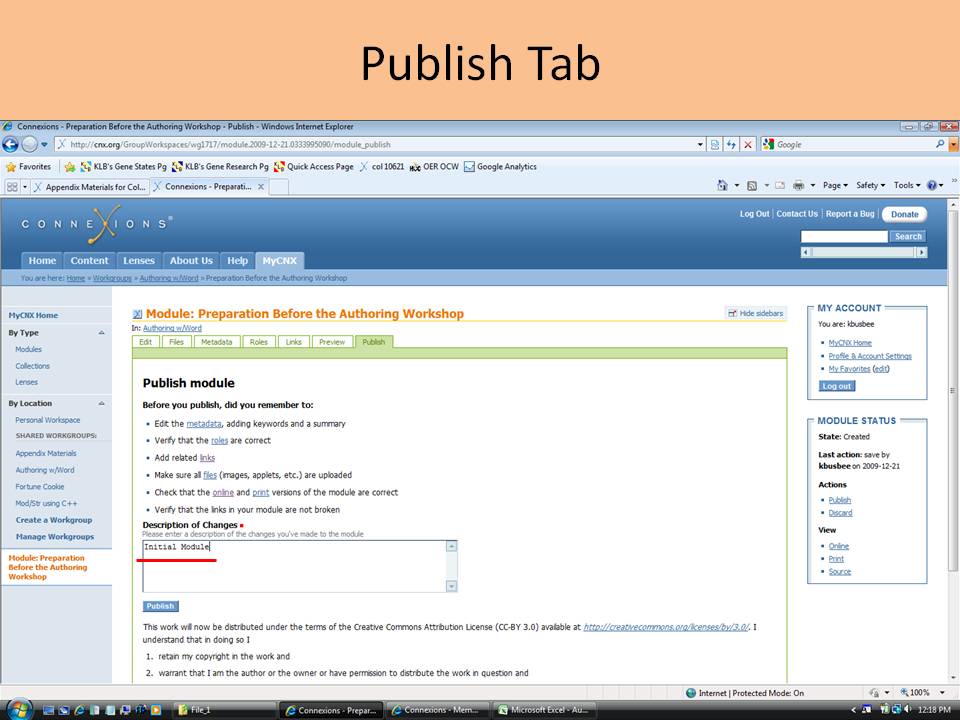
The publish process identifies a short description of the changes (enter “Initial Module” when you first create a module). When you hit the “Publish” button, the software will ask you to confirm “Yes” for you to publish your module.

Congratulations! Your module is now available for the world to use. I usually enter the module’s ID number into my spreadsheet that contains my titles and summaries.
Once you have published your module, you will discover that you want to make some corrections or changes to your module. The process is simple. Navigate to your module.

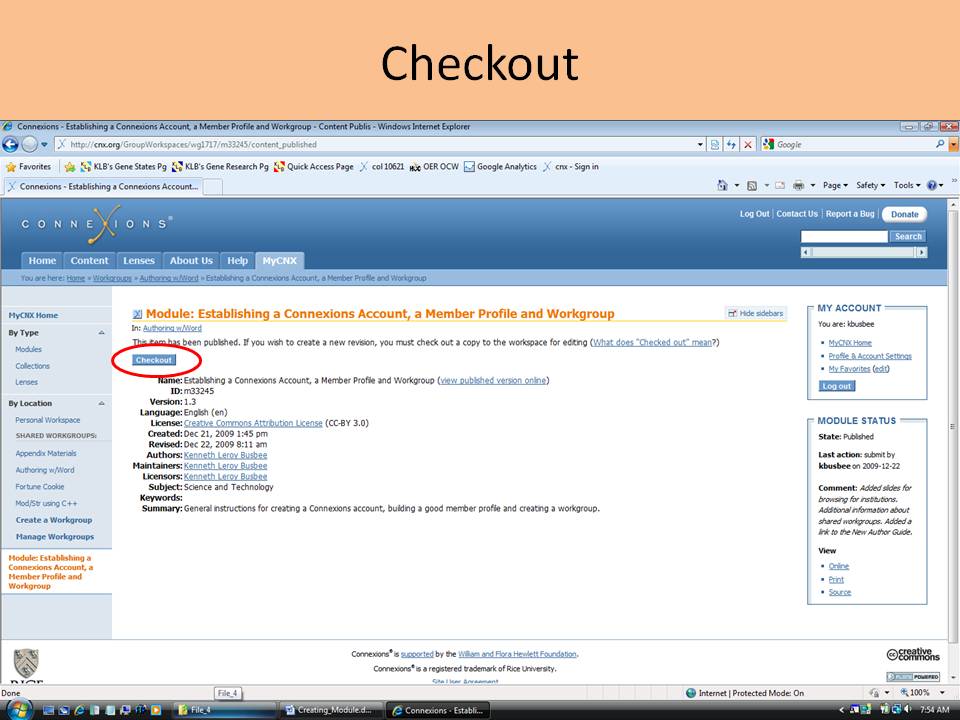
In order to modify the module, you must “Checkout” the module first. This makes a copy of your module available for you to modify. While you are modifying your materials, the previous version of the module is available to the Internet community. Your module will appear with the seven (7) construction tabs. You make changes as needed (this may include editing your Word document and importing it again using the “Edit” tab). When you are done with your changes you need to “Publish” your module in order to make the changes available to the Internet community.
The next module within this workshop contains the results of creating the Flying_Ver3.doc document as a Connexions module. You should review it to aid in your understanding of how the features and styles that we inserted into a Word document were converted upon being imported to a Connexions module.
You should spend a few minutes publishing one of your previously prepared Word documents as a Connexions module.
Notification Switch
Would you like to follow the 'Authoring connexions modules using microsoft word documents' conversation and receive update notifications?

|
|

|
|

|
|

|
|

|
|

|
|

|
|

|
|

|
|

|