Learn the fundamentals of user interfaces for MIDlets, how to instantiate user interface components, how to cause them to become visible on the cell phone screen, the difference between a Screen and a Display, about restrictive constraints and modifier flags, about the MIDlet user interface class hierarchy, and about the methods of the various classes that can be used to manipulate user input and output.
Published: February 12, 2008
By Richard G. Baldwin
Java Programming Notes # 2576
This is one in a series of tutorial lessons designed to teach you how to write programs using the Sun Java Wireless Toolkit for CLDC. The first lesson was titled Getting Started with MIDlets and the Sun Java Wireless Toolkit for CLDC. The previous lesson was titled Back to Basics with MIDlets and the Sun Java Wireless Toolkit for CLDC (see Resources).
What you have learned
In the first lesson I provided and explained a MIDlet development framework that makes experimenting with MIDlet programming easy. In the second lesson, I taught you how to capture and display the standard output and the error output produced by programs executing in a child process. I also applied that knowledge to upgrade the MIDlet development framework from the earlier lesson.
In the previous lesson, I tackled two topics. First I taught you how the CLDC and the MIDP fit into the grand scheme of things when programming MIDlets. Second, I explained and demonstrated the life cycle of a MIDlet.
What you will learn
In this lesson, I will use an object of the TextBox class to teach you the fundamentals of user interfaces for MIDlets. I will show you how to instantiate user interface components and how to cause them to become visible on the cell phone screen. I will explain the difference between a Screen and a Display. I will explain how to use restrictive constraints and modifier flags to control the manner in which text can be edited. I will discuss the class hierarchy for that portion of the hierarchy that deals with user interface components. I will briefly explain the methods of the various classes that can be used to manipulate user input and output.
I recommend that you open another copy of this document in a separate browser window and use the following links to easily find and view the figures and listings while you are reading about them.
I recommend that you also study the other lessons in my extensive collection of online Java tutorials. You will find a consolidated index at www.DickBaldwin.com.
|
A simple MIDlet with a TextBox user interface
I will illustrate this discussion on MIDlet user interfaces with a very simple MIDlet named TextBox01. A complete listing of this MIDlet is shown in Listing 4 near the end of the lesson.
Program output
The execution of this MIDlet in the MIDlet development framework that I provided in the earlier lesson titled Capturing Output Produced by Programs Running in a Child Process (see Resources) produces the Sun cell phone emulator output shown in Figure 1.
Figure 1. Cell phone emulator output for MIDlet TextBox01.
|
|
The standard output
A portion of the standard output produced by this MIDlet is shown in Figure 2.
Figure 2. A portion of the standard output produced by TextBox01.
OUT: Construct MIDlet OUT: Create TextBox OUT: Destroy MIDlet |
Will discuss in fragments
As is my custom, I will discuss and explain this MIDlet in fragments. The first fragment is shown in Listing 1, shows the beginning of the startApp method.
Listing 1. Beginning of the startApp method for TextBox01.
  public void startApp(){
    System.out.println("Create TextBox");

    TextBox textBox = new TextBox(
                             "TextBox Title",
                             "TextBox contents",
                             50,//maxSize
                             TextField.ANY);//constraints

    //Make the TextBox the current display.
    Display.getDisplay(this).setCurrent(textBox);
|
You will recall that this is one of the three methods declared as abstract methods in the MIDlet class. These methods are used to control the life cycle of a MIDlet.
A MIDlet is originally in the paused state when it is launched by the user. The startApp method is called when the cell phone's Application Management Software (AMS) moves the MIDlet from the paused state to the active state.
Instantiate a new TextBox object
Hopefully, given what you already know about Java programming in general, you have already figured out that after displaying a preliminary message, the code in Listing 1 applies the new operator to the constructor for a class named TextBox to instantiate a new object of type TextBox.
|
What is a TextBox object?
TextBox is the name of a class in the javax.microedition.lcdui package. It exists in both MIDP 1.0 and MIDP 2.0. Here is part of what Sun has to say about the TextBox class:
"The TextBox class is a Screen that allows the user to enter and edit text.
A TextBox has a maximum size, which is the maximum number of characters that can be stored in the object at any time (its capacity)...
TextBox has the concept of input constraints that is identical to TextField...
TextBox also has the concept of input modes that is identical to TextField..."
What is a Screen?
Screen is also the name of a class in the javax.microedition.lcdui package. This class is the immediate superclass of the TextBox class (see Figure 4). In MIDP 2.0, the direct subclasses of Screen are:
Objects instantiated from each of these classes are user interface objects. As of MIDP 2.0, none of these classes have subclasses. I will have more to say about the first three classes in the above list in future lessons. In this lesson, I will concentrate on the TextBox class.
What is a Displayable?
The Screen class is a direct subclass of the Displayable class, which in turn is a subclass of Object (see Figure 4). Therefore, since the four classes in the above list are subclasses of the Displayable class, objects of these classes are Displayables or Displayable objects.
The TextBox class constructor
Listing 1 applies the new operator to the constructor for the TextBox class to instantiate a new TextBox object. As of MIDP 2.0, the TextBox class has a single constructor with the following parameters:
The maxSize parameter
The first two parameters in the above list are relatively self-explanatory.
The third parameter is also self-explanatory except, according to Sun,
"The implementation may limit boundary maximum capacity and the actually assigned capacity may be smaller than requested. A defensive application will test the actually given capacity with getMaxSize()."
In other words, even though the programmer may specify a capacity of 100 characters for a TextBox object, the actual cell phone in use may limit the capacity of the object to a smaller number of characters.
The constraints parameter
The fourth parameter in the above list is much more complicated. I will have more to say about this parameter later in this lesson.
What is a TextField?
According to Sun,
"A TextField is an editable text component that may be placed into a Form."
The TextField class and the Form class will be major topics of a future lesson. Our main interest in the TextField class in this lesson has to do with the fourth constructor parameter in the above list (constraints). This interest stems from the fact that the TextField class shares the concept of input constraints with the TextBox class. The explanation of input constraints in the API documentation appears in the documentation for the TextField class. A reference to that material is provided in the documentation for the TextBox class.
We are also interested in the TextField class in this lesson because that is where Sun elected to define the constant values that we need to use for the fourth parameter to the TextBox constructor (see Listing 1). It is important to note that this MIDlet does not contain a TextField object.
What are input constraints?
Here is part of what Sun has to say about input constraints:
"The different constraints allow the application to request that the user's input be restricted in a variety of ways. The implementation is required to restrict the user's input as requested by the application. For example, if the application requests the NUMERIC constraint on a TextField, the implementation must allow only numeric characters to be entered."
Special formatting of text
Sun goes on to tell us
The actual contents of the text object are set and modified by and are reported to the application through the TextBox and TextField APIs. The displayed contents may differ from the actual contents if the implementation has chosen to provide special formatting suitable for the text object's constraint setting."
For example, a PHONENUMBER field might be displayed with digit separators and punctuation but the actual contents of the text object available to the application would simply be a string of digits.
Restrictive constraints and modifier flags
Continuing with Sun's explanation,
"Some constraints, such as DECIMAL, require the implementation to perform syntactic validation of the contents of the text object. The syntax checking is performed on the actual contents of the text object, which may differ from the displayed contents as described above...
The methods and constructors throw IllegalArgumentException if they would result in the contents of the text object not conforming to the required syntax.
The value ... consists of a restrictive constraint setting described above, as well as a variety of flag bits that modify the behavior of text entry and display."
The restrictive constraints in MIDP 2,0
The restrictive constraint settings, which are provided as public static final variables in the TextField class are as follows:
I will leave it as an exercise for the student to examine Sun's documentation to get a full understanding of each of the restrictive constraints in the above list. Example MIDlets in this lesson will illustrate the use of the ANY and NUMERIC input constraints. For the ANY constraint, the user is allowed to enter any text into the TextBox or the TextField. For the NUMERIC constraint, the user is only allowed to enter numeric characters.
What are the modifier flags?
As the name implies, the modifier flags modify the restrictive constraints in the above list to provide additional specialization. The available modifier flags in MIDP 2.0 are
Once again, I will leave it as an exercise for the student to examine Sun's documentation to get a full understanding of each of the modifier flags. Example MIDlets in this lesson will illustrate the use of the UNEDITABLE modifier flag. According to Sun, the UNEDITABLE modifier flag
"Indicates that editing is currently disallowed. When this flag is set, the implementation must prevent the user from changing the text contents of this object. The implementation should also provide a visual indication that the object's text cannot be edited."
|
Constructing the complete constraint value
The modifier flags can be combined with restrictive constraints by using the bit-wise inclusive OR operator. For example, to specify an input constraint of UNEDITABLE NUMERIC data, use the syntax shown in Listing 2 for the fourth parameter to the TextBox constructor.
Listing 2. Input constraint for UNEDITABLE NUMERIC data.
    TextBox textBox = new TextBox(
                "TextBox Title",
                "123",
                50,
                TextField.NUMERIC | TextField.UNEDITABLE);

    Display.getDisplay(this).setCurrent(textBox);
|
The cell phone emulator output with editing disabled
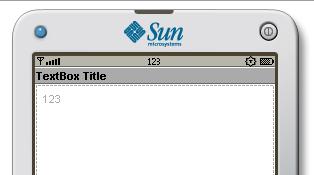
When displayed in Sun's cell phone emulator, the TextBox created and populated by the code in Listing 2 appears as shown in Figure 3. Note that the numeric contents of the TextBox are gray instead of black, indicating that the contents of the TextBox cannot be edited by the user.
Figure 3. Sun cell phone emulator display of UNEDITABLE NUMERIC data in a TextBox.
|
|
Behavior of the NUMERIC constraint
If you substitute "abc" for "123" in Listing 2, the prescribed TextBox contents won't satisfy the NUMERIC constraint and the MIDlet will throw a java.lang.IllegalArgumentException when you launch the MIDlet in the Sun cell phone emulator.
What are Input Modes?
According to Sun,
"... the application can request that the entry of certain characters be made convenient. It can do this by passing the name of a Unicode character subset to the setInitialInputMode() method. Calling this method requests that the implementation set the mode of the text entry user interface so that it is convenient for the user to enter characters in this subset. The application can also request that the input mode have certain behavioral characteristics by setting modifier flags in the constraints value."
I'm not even going to try to explain this beyond providing the above partial quotation of Sun's explanation. Rather, I will simply refer you to the Sun documentation if you need to know how to implement Input Modes in the input constraints.
A Screen versus a Display
What is the difference between a Screen and a Display? This question can probably be answered by examining the partial class hierarchy for MIDP 2.0 shown in Figure 4. I will discuss and illustrate the classes shown in boldface in this lesson. I will discuss and illustrate the remaining classes in Figure 2 in future lessons. I will also update the partial class hierarchy to include additional classes and refer to the modified version in future lessons.
Figure 4. Partial class hierarchy for MIDP 2.0.
|
The class hierarchy
As you can see in Figure 4, the Screen class is a subclass of the Displayable class and is also the superclass of the TextBox class and its siblings (Alert, Form, and List). Therefore, a TextBox object is a Displayable object. It is also a Screen object or simply a Screen.
No public constructors
Neither the Screen class nor the Displayable class are abstract. However, neither of them provides a public constructor, so it is not possible to instantiate an object of either class. As a result, it appears that there are only three ways to create a Displayable object:
More on the class hierarchy
According to Sun, the Screen class is the common superclass of all high-level user interface classes. (Canvas and GameCanvas are not considered to be high-level user interface classes.)
Whereas a Screen object is limited to objects of the TextBox, Alert, Form, and List classes (and their subclasses), a Displayable object also includes objects instantiated from subclasses of the Canvas and GameCanvas classes.
An object of the class Display
A Displayable object is an object that has the capability of being placed on the cell phone's physical display. The physical display is represented by an object of the class Display.
A Display object represents the manager of the display and input devices of the system. It includes methods for retrieving properties of the device and for requesting that objects be displayed on the device.
An analogy
To a first degree of approximation, the relationship between a TextBox object and a Display object in the WTK is similar to the relationship between an AWT TextField object and an AWT Frame object.
For example, a Frame object:
Thus, a Frame object manages the display of other Java objects such as AWT TextField objects.
Similarly, a WTK Display object manages the display of other WTK objects such as TextBox objects.
However, there are many differences between an AWT Frame and a WTK Display, so don't put too much stock in this analogy.
Setting the current Display
That brings us to the point where you should be able to understand the last statement in Listing 1. The Display class defines several methods, one of which is a static method named getDisplay. The getDisplay method gets access to a Display object that is unique to the MIDlet object that is passed as a parameter to the method (this is this MIDlet).
Once access to the Display object is obtained, a variety of instance methods can be called on the object. One of those methods is setCurrent. MIDP 2.0 contains two overloaded versions of this method. One version, which is the version called in Listing 1, requires an incoming parameter of type Displayable.
The setCurrent method
Here is a small part of what Sun has to say about the setCurrent method:
"Requests that a different Displayable object be made visible on the display. The change will typically not take effect immediately..."
In addition to the above, Sun has a great deal to say about timing issues when this method is called. I strongly recommend that you strive to understand those timing issues before attempting to develop a J2ME product.
Thus, the last statement in Listing 1 requests that the TextBox object be made visible on the cell phone screen.
The remaining code in TextBox01
The remaining code in the MIDlet named TextBox01 is straightforward and shouldn't require further explanation. You can view the remaining code in Listing 4 near the end of the lesson.
Now let's discuss things in more general terms. Because Displayable is the superclass of all objects that can be displayed by the WTK on the cell phone screen, all of the methods defined in the Displayable class are inherited into and can be called on those objects.
The methods defined in the Displayable class of MIDP 2.0 are shown in Figure 5.
Figure 5. Methods of the Displayable class in MIDP 2.0.
|
Grouped into categories
I grouped the methods in Figure 5 into four categories to make them easier to discuss and understand.
If you are an experienced Java OOP programmer, you should be able to predict the behavior of the five methods in the first group based simply on their names and brief descriptions. If not, you should take a serious look at the MIDP 2.0 API documentation and/or possibly step back and polish your Java OOP programming skills.
The same may also be true for the two methods in the second group, but just to be sure, I will present and explain a simple MIDlet that implements a Ticker.
The methods in the third group with the word command in their names are used to create interactive MIDlets, similar to the use of event listeners and event sources in J2SE. This is a very important topic, and I will dedicate an entire future lesson to this topic.
The description of the last method at the bottom of Figure 5 isn't difficult to understand. This method is intended to be overridden. However, at this point in time, I'm unable to describe a practical situation where this method would be called and therefore, I am also unable to describe what the behavior of the overridden method should be.
A Ticker Example
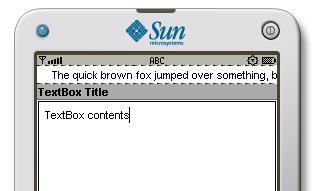
Now let's take a look at a sample MIDlet that uses the ticker methods. Figure 6 shows the top portion of the cell phone emulator output for the MIDlet named Ticker01. A complete listing of this MIDlet is provided in Listing 5.
Figure 6. Cell phone emulator output for MIDlet Ticker01.
|
|
If you run this MIDlet, you will see the text in the horizontal white strip at the top of the screen scrolling from right to left like a "ticker tape."
Beginning of the MIDlet class named Ticker01
The beginning of the class definition for the MIDlet named Ticker01 is shown in Listing 3.
Listing 3. Beginning of the MIDlet class named Ticker01.
public class Ticker01 extends MIDlet{

  public Ticker01(){
    System.out.println("Construct MIDlet");
  }//end constructor

  public void startApp(){
    String tickerText =
      "The quick brown fox jumped over something, but I "
      + "don't remember what it was.";
    Ticker ticker = new Ticker(tickerText);

    System.out.println("Create TextBox");

    TextBox textBox = new TextBox("TextBox Title",
                                  "TextBox contents",
                                  50,//width
                                  TextField.ANY);

    //Attach the ticker to the text box.
    textBox.setTicker(ticker);

    //Make the TextBox be the current display.
    Display.getDisplay(this).setCurrent(textBox);
|
Update to TextBox01
This MIDlet program is an update to the earlier MIDlet named TextBox01. I highlighted the changes required to create and attach the Ticker object to the TextBox object. The process is straightforward and shouldn't require further explanation.
Remember, all of the classes that are subclasses of the Displayable class shown in Figure 4 inherit the ticker methods. Presumably therefore, a Ticker object can be attached to any object instantiated from any of those classes.
The same Ticker object can be attached to more than one Displayable object. Therefore, you can create a situation where the same Ticker continues to scroll and to be visible as your MIDlet switches from one Screen to the next. There are a number of other interesting ramifications to the Ticker class, so I recommend that you study the documentation for that class in detail.
Next, we will take a look at the methods of the Display class to get an idea of the manner in which this class makes it possible for our MIDlet to communicate with the hardware. Once again, I have grouped the methods into several categories.
Figure 7. Methods of the Display class in MIDP 2.0.
|
There are a fairly large number of methods, which appear to be somewhat overwhelming when you view them in alphabetical order in the documentation. However, once they are grouped by general function, they don't look so overwhelming after all.
The "current" group
The first three methods in the first group either
You should have no difficulty with those three methods.
The fourth method in this group goes a little further and establishes not only which Displayable object will become visible, but also establishes which item in that object will be scrolled into view. For example, this method could be used to cause a specific item in a long list of items to become visible.
The "get property" group
The first method in the second group is the getDisplay method, which we discussed earlier. The remaining seven methods in that group simply query the system to determine the value of seven different properties. If you are familiar with the use of properties in JavaBeans components, these methods should also be understandable on the basis of the names and the brief descriptions.
The "custom operation" group
The two methods in the third group allow you to ask the hardware to either flash the backlight on the display or cause the cell phone to vibrate for a specified period of time. There doesn't seem to be anything too complex here.
The callSerially method
This method in the fourth group appears to be used with graphics and the Canvas class, so I will defer a discussion of this method until a future lesson when I discuss graphics and the Canvas class.
One instance of Display per MIDlet
There is only one instance of Display per MIDlet, but each MIDlet can have any number of Displayable objects, often referred to as screens or canvases. However, only one Displayable object can become visible by way of the Display object at any time. That object is referred to as the current object. What this means is that unlike standard Java user interfaces where many items can be visible at any time, only one of the following Displayable objects can be visible at a time under J2ME.
A Form can contain multiple items
Note, however, that a Form can contain an arbitrary number of other items. Therefore, it is possible to display two or more items at the same time by adding them to the Form. Items are added to the Form by calling the set, append, or insert method on the Form. I will have a lot more to say about the Form class in a future lesson.
Accessing the Display object
MIDlet code can get access to the Display object at any point during the execution of the MIDlet by calling the static getDisplay method of the Display class. Once the MIDlet code has access to the MIDlet object, it can call any of the methods listed in Figure 7 on that object.
For example, we saw in Listing 1 how the setCurrent method can be used to cause a particular Displayable object to become visible on the cell phone screen. The MIDlet code can use this approach to switch among any number of Displayable objects making different Displayable objects visible at different points in time during the execution of the MIDlet program.
Foreground versus background
A MIDlet may be running in the foreground, in which case its current Displayable objects will probably be visible. On the other hand, a MIDlet may run in the background behind another MIDlet, in which case none of its Displayable objects will be visible. However, it will still have a current Displayable object. The current Displayable object is the object that will become visible if the MIDlet is allowed to move to the foreground.
We have seen the methods of the Display class that make it possible for the MIDlet to communicate with the hardware relative to the display. We have also seen how behavior can be imparted to all Displayable objects by methods of the Displayable class.
The Screen class, which extends Displayable serves only to distinguish high level user interface capabilities from the low level graphics capabilities provided by the Canvas class. The Screen class doesn't define any methods in MIDP 2.0.
Therefore, other than the behavior imparted to all Displayable objects by the methods shown in Figure 5, the behavior of each different type of Displayable object is imparted by the methods defined in that object's class: Canvas, TextBox, Alert, Form, and List. I will discuss the methods of the TextBox class in this lesson and will discuss the methods of the other four classes in future lessons.
Methods of the TextBox class in MIDP 2.0
Figure 8 shows the methods defined in the TextBox class in MIDP 2.0.
Figure 8. Methods of the TextBox class in MIDP 2.0.
|
Grouped into categories
In order to make it easier to discuss and to understand the methods defined in the TextBox class, I have grouped them into categories in Figure 8.
The four methods in the first group are setter methods that make it possible to establish the values of the same four properties for which parameters are provided in the constructor.
The editing methods
The four methods in the second group can be used to modify the contents of the TextBox by deleting characters, inserting characters, or replacing characters in the text string contained in the TextBox.
Data extraction methods
The two methods in the third group are used to extract the data contained in the TextBox in either of two formats: a String or an array of characters.
Typical getter methods
The four methods in the fourth group are typical getter methods used to get the values of four different properties of the TextBox object.
Miscellaneous setter methods
The setTicker method in the fifth group seems to be redundant with the method having the same name in the Displayable class. Although I didn't make a word-for-word comparison, the description of this method in the documentation for the TextBox class seems to be the same as, or very similar to the description of the method in the documentation for the Displayable class.
You may recall that I punted when time came to explain the concept of input modes earlier in this lesson, and I will do the same again here. I will simply refer you to the Sun documentation for the method named setInitialInputMode if you need to know about input modes.
I encourage you to copy the code from Listing 4 and Listing 5 and run it in the MIDlet development framework that I provided in the earlier lesson titled Capturing Output Produced by Programs Running in a Child Process (see Resources). Experiment with the MIDlet code, making changes and observing the results of your changes. See if you can explain why your changes have the effect that they have.
Don't forget that you will need to download and install the latest version of the Sun Java Wireless Toolkit for CLDC (see Resources). As of the date this lesson is being written, the latest version of the toolkit is WTK2.5.2.
In this lesson, I used an object of the TextBox class to teach you the fundamentals of user interfaces for MIDlets.
I showed you how to instantiate user interface components and how to cause them to become visible on the cell phone screen.
I explained the difference between a Screen and a Display.
I explained how to use restrictive constraints and modifier flags to control the manner in which text can be edited.
I discussed the class hierarchy for that portion of the hierarchy that deals with user interface components.
I briefly explained the methods of the various classes that can be used to manipulate user input and output.
In Listing 1 and Listing 3 above, I showed you code for two very short MIDlets that were designed to illustrate specific MIDlet programming concepts involving the user interface. Those MIDlets made very little effort to satisfy the rules for compliance with the life cycle requirements of a MIDlet.
In the second part of this lesson, I will present and explain two MIDlets that show how to write user interface code while complying with the life cycle requirements of a MIDlet.
The second MIDlet will differ from the first in that it will also attempt to minimize the memory footprint of the MIDlet while the MIDlet is in the paused state.
Listing 4. The MIDlet named TextBox01.
//34567890123456789012345678901234567890123456789012345678
//Be sure to preserve < and > in html version
//======================================================//

/*TextBox01.java
Copyright 2007, R.G.Baldwin

The purpose of this program is to illustrate a TextBox
user interface object.

Tested using a Java SE 6 compiler, targeted at a V1.4
virtual machine, and WTK 2.5.2 running under Windows XP.
*********************************************************/

package TextBox01;

import javax.microedition.lcdui.Display;
import javax.microedition.lcdui.TextBox;
import javax.microedition.lcdui.TextField;
import javax.microedition.midlet.MIDlet;

public class TextBox01 extends MIDlet{

  public TextBox01(){
    System.out.println("Construct MIDlet");
  }//end constructor

  public void startApp(){

    System.out.println("Create TextBox");

    TextBox textBox = new TextBox("TextBox Title",
                                  "TextBox contents",
                                  50,//width
                                  TextField.ANY);

    //Make the TextBox be the current display.
    Display.getDisplay(this).setCurrent(textBox);

    //Sleep for 20 seconds.
    try{Thread.currentThread().sleep(20000);
    } catch(Exception e){}

    //Enter the destroyed state.
    this.destroyApp(true);
  }//end startApp

  public void pauseApp(){
  }//end pauseApp

  public void destroyApp(boolean unconditional){
    System.out.println("Destroy MIDlet");
    notifyDestroyed();
  }//end destroyApp

}//end class TextBox01
|
Listing 5. The MIDlet named Ticker01.
/*Ticker01.java
Copyright 2007, R.G.Baldwin

The purpose of this program is to illustrate a TextBox
user interface object with an attached Ticker.

Tested using a Java SE 6 compiler, targeted at a V1.4
virtual machine, and WTK 2.5.2 running under Windows XP.
*********************************************************/

package Ticker01;

import javax.microedition.lcdui.Display;
import javax.microedition.lcdui.TextBox;
import javax.microedition.lcdui.TextField;
import javax.microedition.lcdui.Ticker;
import javax.microedition.midlet.MIDlet;

public class Ticker01 extends MIDlet{

  public Ticker01(){
    System.out.println("Construct MIDlet");
  }//end constructor

  public void startApp(){
    String tickerText =
      "The quick brown fox jumped over something, but I "
      + "don't remember what it was.";
    Ticker ticker = new Ticker(tickerText);

    System.out.println("Create TextBox");

    TextBox textBox = new TextBox("TextBox Title",
                                  "TextBox contents",
                                  50,//width
                                  TextField.ANY);

    //Attach the ticker to the text box.
    textBox.setTicker(ticker);

    //Make the TextBox be the current display.
    Display.getDisplay(this).setCurrent(textBox);

    //Sleep for 60 seconds.
    try{Thread.currentThread().sleep(60000);
    } catch(Exception e){}

    //Enter the destroyed state.
    this.destroyApp(true);
  }//end startApp

  public void pauseApp(){
  }//end pauseApp

  public void destroyApp(boolean unconditional){
    System.out.println("Destroy MIDlet");
    notifyDestroyed();
  }//end destroyApp

}//end class Ticker01
|
Copyright 2008, Richard G. Baldwin. Reproduction in whole or in part in any form or medium without express written permission from Richard Baldwin is prohibited.
Richard has participated in numerous consulting projects and he frequently provides onsite training at the high-tech companies located in and around Austin, Texas. He is the author of Baldwin's Programming Tutorials, which have gained a worldwide following among experienced and aspiring programmers. He has also published articles in JavaPro magazine.
In addition to his programming expertise, Richard has many years of practical experience in Digital Signal Processing (DSP). His first job after he earned his Bachelor's degree was doing DSP in the Seismic Research Department of Texas Instruments. (TI is still a world leader in DSP.) In the following years, he applied his programming and DSP expertise to other interesting areas including sonar and underwater acoustics.
Richard holds an MSEE degree from Southern Methodist University and has many years of experience in the application of computer technology to real-world problems.
Keywords
java J2ME MIDlet "cell phone emulator" "wireless toolkit" WTK MIDP CLDC "MIDlet
life cycle" Displayable TextBox Ticker TextField
-end-