Connect the blocks as shown in the following figure:
Video Surveillance model
Save the model as "surveillance_sim.mdl".
Running the model
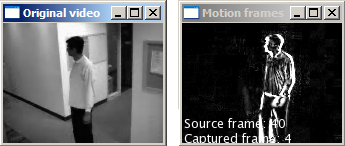
Run the model. You should observe the following images:
Current Frame
Recorded Frame
Double click the scope and you will see:
In this scope display, yellow represents the motion estimate from each video frame, and magenta is the threshold level. In the Motion Threshold scope here, we see that we identified five frames with motion above the threshold that were captured and recorded.
Rename the “R_W Algorithm” subsystem to “Surveillance Algorithm”.
Double-click the “Surveillance Algorithm” block.
In this block, add a Add the “Function- Call Subsystem” from the “Ports&Subsystems" group of the "Simulink" Blockset.
Rename “Function- Call Subsystem” to “Video Frame Capture Motion Threshold” and Double-click it.
Open the model "surveillance_sim.mdl", created in section and copy it into “Video Frame Capture Motion Threshold ”.
Add three input ports "In1" from the "Sources" group of the "Simulink" blockset and three output ports "Out1" from the "Sinks" group of the "Simulink" blockset.
Add a "Switch" from the "Signal Routing" group of the "Simulink" blockset and a "Gain" from the "Math Operation" group of the "Simulink" blockset.
Double-click the “Motion Energy” block and add him another output port as shown:
Connect the blocks as shown:
Configure the "Gain" block :
Configure the "Switch" block :
Double-click the “Surveillance Algorithm” subsystem.
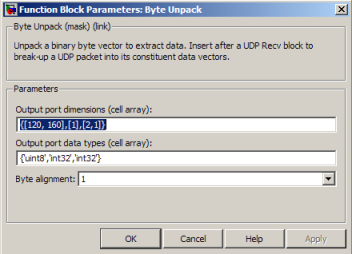
Configure the "Byte Unpack" block :
Configure the "Byte Pack" block :
Configure the " TCP/IP Receive " block :
Configure the " TCP/IP Send " block :
Connect the “Video Frame Capture Motion Threshold ” block as shown:
Open the “RW_pcl_tcpip.mdl” model, created in the "Video R_W" file
Rename the model "my_pc_surveil_tcpip.mdl".
Add the "Manual Switch" from the "Signal Routing" group of the "Simulink" blockset and three "Constant" blocks from the "Signal Processing" group of the "Signal Processing" blockset.
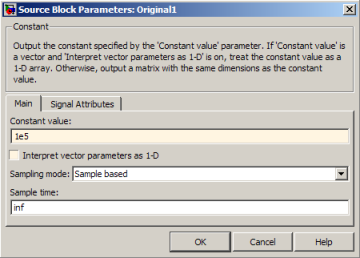
Configure the " Constant " blocks:
Configure the "Byte Unpack" block :
Connect the block as shown:
Configure the " TCP/IP Receive " block :
Double-click the “Display” subsystem.
Double-click the “Data Unpack” subsystem.
Configure the "Byte Unpack" block :
Connect the block as shown:
Add to the "Display" subsystem the "Insert Text" from the " Text&figure__" group of the " Video and Image Processing " blockset, " Floating Scope" from the "Sinks" group of the "Simulink" blockset.
Configure the " Insert Text " block :
Add the “Subsystem” from the “Ports&Subsystems" group of the "Simulink" Blockset
Rename it "Combine Count"
Add a "Frame Counter" subsystem as we did in paragraph 14 at the first section.
Add a "Matrix Concatenate" from the "Math Operations" group of the "Simulink" blockset.
Connect the block as shown:
Configure the " Matrix Concatenate" block :
Connect the "Display" subsystem as shown:
Open a new m-file, copy the following code and save it as "my_tcpip_surveil_script.m" at the same directory as the model.
function my_tcpip_surveil_script(hostModelName)
%my_tcpip_surveil_script controls host-side TCP/IP processing for%  Video Surveillance demo:
%  1) Builds and runs the target application%********** Initialization ********************
% Get model namemodelName = gcs;% Connect to CCS
CCS_Obj = connectToCCS(modelName);saved_visibility = CCS_Obj.isvisible;
CCS_Obj.visible(1);% Load applicationloadApp(modelName, CCS_Obj);% Run application
fprintf('Running application: %s\n', modelName);CCS_Obj.run;% Allow some time for DHCP address acquisition
pause(3);% Retrieve target's host nameboardType = get_param([modelName '/IP Config'], 'boardType');userPrompt = sprintf('Enter the IP address or the host name of the %s board: ', boardType);
hostName = inputdlg(userPrompt, 'Target IP address');if isempty(hostName)
    errordlg('You have to provide a valid IP address or host name to run the demo.', ...'TCP/IP Surveillance Recording', 'modal');
    return;end
hostName = strtrim(hostName{1});% Launch host side UDP receive / Video display model
fprintf('Launching host side application: %s\n', hostModelName);open_system(hostModelName);% Update host side TCP/IP blocks with target's IP address
set_param([hostModelName '/TCP//IP Send'], 'Host', hostName);
set_param([hostModelName '/TCP//IP Receive'], 'Host', hostName);
fprintf('Click on play button to start running the host side application!\n\n')%[EOF]tcpip_surveil_script.m
Open a new m-file, copy the following code and save it as "my_tcpip_surveil_script.m" at the same directory as the model.
now we have two models ("my_pc_surveil_tcpip.mdl" and "my_dm6437evmsurveil_tcpip.mdl") and one MATLAB file ("my_tcpip_surveil_script.m")
Running the real-time model
Build load and run the project from the "my_dm6437evmsurveil_tcpip.mdl" model. Double-click the " Build / Reload&Run" block.
Running the script, you will see:
If you want to display the Absolute Differences Image, change the state of the switch from 0 to 1. You will then see:
Receive real-time job alerts and never miss the right job again
Source:
OpenStax, From matlab and simulink to real-time with ti dsp's. OpenStax CNX. Jun 08, 2009 Download for free at http://cnx.org/content/col10713/1.1
Google Play and the Google Play logo are trademarks of Google Inc.
Notification Switch
Would you like to follow the 'From matlab and simulink to real-time with ti dsp's' conversation and receive update notifications?