

| << Chapter < Page | Chapter >> Page > |
I recommend that you also study the other lessons in my extensive collection of online programmingtutorials. You will find a consolidated index at www.DickBaldwin.com .
For Adobe online documentation on this topic, see Using Drag and Drop .
A drag and drop operation is carried out in three stages:
Initiation
As you are probably already aware, initiation consists of the user pointing to an item with the mouse and pressing the mouse button.
Dragging
During the drag operation, the user drags the item to another location on the screen without releasing the mouse button.
Dropping
When the item has been dragged to the new location, the user releases the mouse button causing the item to remain in the new location.
Copying
It is also possible to copy an item using the drag and drop gestures, but that capability won't be illustrated in this lesson. Instead, this lesson willconcentrate on moving a Flex component from one location in its container to a different location in its container.
Classes and events
The sample program that I will explain in this lesson will use the following classes, methods, and events:
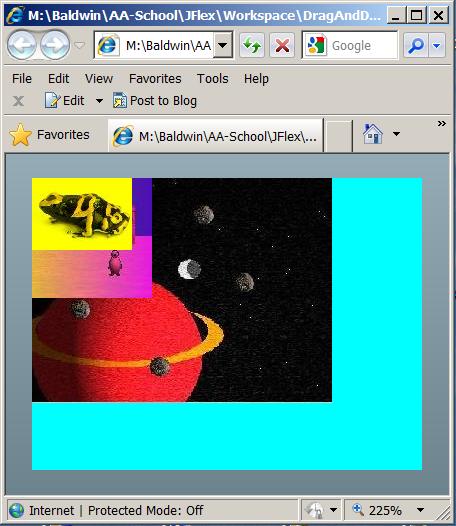
I will explain a program named DragAndDrop01 . This program illustrates the fundamentals of drag and drop in ActionScript 3. The program places three imagesin the upper-left corner of a Canvas object as shown in Figure 1.
The program file structure
The program file structure, taken from the Flex Builder 3 Navigator panel is as shown in Figure 2.

Three image files
As you can see in Figure 2, the program uses the following image files :
The z-axes indices
The program sets the z-axis indices in the order shown in the above list on the Image objects produced using the image files. This causes the space image to be in the back (0), the frog image to be in the front (2), and the snowscene image to be in the middle (1).
The three images are initially placed in the upper-left corner of the canvas, which is shown as a cyan rectangle in Figure 1.
Any image can be dragged
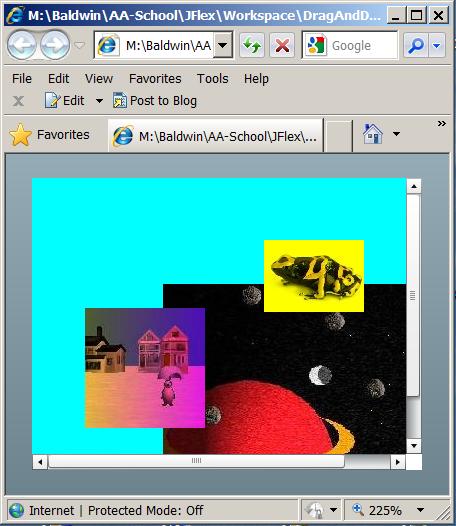
If you run this program, you will see that any any of the images can be dragged and dropped anywhere within the canvas as long as the mouse pointer doesn't leave the canvas. However, if the edge of thedragged image goes outside the left edge or the top of the canvas, the drag and drop operation is aborted.
If the dragged image goes outside the right side or the bottom of the canvas, scroll bars automatically appear on the canvas as shown in Figure 3.
Program output after dragging the images
Figure 3 shows the program output after dragging the three images to different locations.
Notification Switch
Would you like to follow the 'Object-oriented programming (oop) with actionscript' conversation and receive update notifications?

|
|

|
|

|
|

|
|
|
|
|

|
|

|
|

|
|

|
|

|